I bit confused about instructions on download details page. It says that GRMSDK_EN_DVD.iso is for x86, GRMSDKX_EN_DVD.iso is for AMD and GRMSDKIAI_EN_DVD.iso for Itanium. The X in the second one seems to be for x86. Just in the same way the third one shows IAI which is for Itanium IA64. So the fisrt one should be for the one which is left:AMD. Maybe there is a TYPOGRAPHICAL ERROR. Am I right or instructions are correct?.
Instructions
The Windows SDK is available as a DVD ISO image file so that you can burn your own DVD. If you do not need to burn a DVD the SDK is also available via web setup. To verify that you are downloading the correct ISO file, please refer to the table below to select a file to download based upon your chip type. Additionally, you can use the CRC and SHA1 to validate that the file you’ve downloaded is the correct file.
================================================
File Name: GRMSDK_EN_DVD.iso // 这个 其实 是 AMD64 的
Chip: X86
CRC#: 0xCA4FE79D
SHA1: 0x8695F5E6810D84153181695DA78850988A923F4E
================================================
File Name: GRMSDKX_EN_DVD.iso // 这个 才是 X86 的。
Chip: AMD64
CRC#: 0xB417A4F7
还是直接用 web 安装,就可以了。
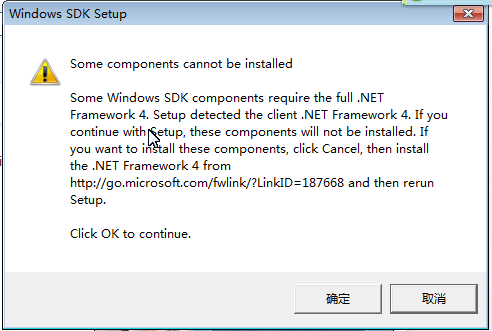
64 位的要用 x64的,得安装.NetFrameWork 4.0, download 很快的。
D2D的例子所在:
C:\Program Files\Microsoft SDKs\Windows\v7.1\Samples\multimedia\Direct2D\
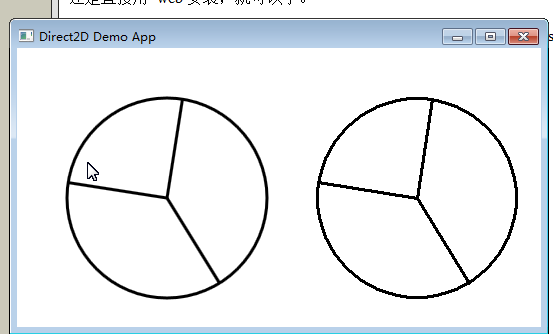
下了例子,看性能,是text 动画, cpu 是 100% 了,但 text 的 anti-alise 非常好

一边 是 D2D 绘制的,一般是 普通 GDI绘制,很明显的区别:
HRESULT DemoApp::OnRender(const PAINTSTRUCT &ps)
{
HRESULT hr;
RECT rc;
// Get the dimensions of the client drawing area.
GetClientRect(m_hwnd, &rc);
//
// Draw the pie chart with Direct2D.
//
// Create the DC render target.
hr = CreateDeviceResources();
if (SUCCEEDED(hr))
{
// Bind the DC to the DC render target.
hr = m_pDCRT->BindDC(ps.hdc, &rc);
m_pDCRT->BeginDraw();
m_pDCRT->SetTransform(D2D1::Matrix3x2F::Identity());
m_pDCRT->Clear(D2D1::ColorF(D2D1::ColorF::White));
m_pDCRT->DrawEllipse(
D2D1::Ellipse(
D2D1::Point2F(150.0f, 150.0f),
100.0f,
100.0f),
m_pBlackBrush,
3.0
);
m_pDCRT->DrawLine(
D2D1::Point2F(150.0f, 150.0f),
D2D1::Point2F(
(150.0f + 100.0f * 0.15425f),
(150.0f - 100.0f * 0.988f)),
m_pBlackBrush,
3.0
);
m_pDCRT->DrawLine(
D2D1::Point2F(150.0f, 150.0f),
D2D1::Point2F(
(150.0f + 100.0f * 0.525f),
(150.0f + 100.0f * 0.8509f)),
m_pBlackBrush,
3.0
);
m_pDCRT->DrawLine(
D2D1::Point2F(150.0f, 150.0f),
D2D1::Point2F(
(150.0f - 100.0f * 0.988f),
(150.0f - 100.0f * 0.15425f)),
m_pBlackBrush,
3.0
);
hr = m_pDCRT->EndDraw();
if (SUCCEEDED(hr))
{
//
// Draw the pie chart with GDI.
//
// Save the original object.
HGDIOBJ original = NULL;
original = SelectObject(
ps.hdc,
GetStockObject(DC_PEN)
);
HPEN blackPen = CreatePen(PS_SOLID, 3, 0);
SelectObject(ps.hdc, blackPen);
Ellipse(ps.hdc, 300, 50, 500, 250);
POINT pntArray1[2];
pntArray1[0].x = 400;
pntArray1[0].y = 150;
pntArray1[1].x = static_cast<LONG>(400 + 100 * 0.15425);
pntArray1[1].y = static_cast<LONG>(150 - 100 * 0.9885);
POINT pntArray2[2];
pntArray2[0].x = 400;
pntArray2[0].y = 150;
pntArray2[1].x = static_cast<LONG>(400 + 100 * 0.525);
pntArray2[1].y = static_cast<LONG>(150 + 100 * 0.8509);
POINT pntArray3[2];
pntArray3[0].x = 400;
pntArray3[0].y = 150;
pntArray3[1].x = static_cast<LONG>(400 - 100 * 0.988);
pntArray3[1].y = static_cast<LONG>(150 - 100 * 0.15425);
Polyline(ps.hdc, pntArray1, 2);
Polyline(ps.hdc, pntArray2, 2);
Polyline(ps.hdc, pntArray3, 2);
DeleteObject(blackPen);
// Restore the original object.
SelectObject(ps.hdc, original);
}
}
if (hr == D2DERR_RECREATE_TARGET)
{
hr = S_OK;
DiscardDeviceResources();
}
return hr;
}
http://www.microsoft.com/download/en/details.aspx?displaylang=en&id=8442
use above URL to download the ISO file.
.NetFramework4 大概有 54M。
link :http://www.microsoft.com/download/en/confirmation.aspx?id=17851
So much info in so few words. Toltosy could learn a lot.